Showing posts with label Wild Card Series. Show all posts

Friday, March 19, 2010

Wild Card #27 -Hello Miss Talking to You

This is a very fun telephone shaped card #27, it can be found on page 58 of the wild card booklet.

Circled in red are the images I cut for this card.
Each image was cut at 5 1/4"

The front of the envelope and the inside of the card
I added stickles/glitter glue to the phone cord, and added bling around the dial.

post signature

Tuesday, March 16, 2010

Wild Card #26 -Branch

Here is a lovely card from the wild card Cricut cartridge, this is card #26 from page 57 of the wild card series. The uniqueness of this card is the large leaf fold toward the right and the rest of the card fold toward the left.
Images circled in red were cut for this card.
Cut images.

This is the outside of the envelope.

I used stickles/glitter glue for a fun glitter look.

post signature

Tuesday, March 9, 2010

Wild Card #25 - Flower

A very simple yet lovely card. This is wild card #25, it can be found on page 56 of the wild card booklet.
Circled in red are the images that were cut for this card.
Each image was cut at 4 3/4"

Using the smaller flowers I layered them using the three different patterned papers, then added a small jewel in the center of the flower.
This is the envelope closed and the inside of the flower card.
I used the extra flowers to decorate the back side of the card.

Thanks for coming to my blog :)

post signature

Tuesday, March 2, 2010

Wild Card #24 -Porthole Love You

I love to see how using different patterned paper changes the whole look of a card, from the one shown in the booklet. This is wild card #24 found on page 55 of the wild card booklet.

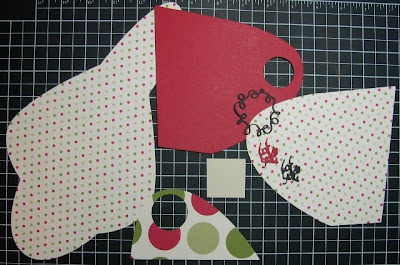
Here are the images circled in red that I cut for this card, notice I cut the phrase "I love you" twice, also the blackout feature card image was flipped before cutting.

All images were cut at 5 1/2" (I do not use the real dial size feature) The square image was cut using my paper trimmer at 1 1/4", this was used behind the hole as shown in the photo below.

This is the view of the inside of the card. I covered the porthole on the card using the square image. Then covered the square using the flipped blackout card image. I decided to cut the "I" off of the phrase leaving "love you", then layered the red over the black cardstock.

A closer look at the lovely squiggle icon feature.
Remember to continue following my Wild Card series, and become a follower.

post signature

Friday, February 26, 2010

Wild Card #23 -Thinking of You

This card is a "thinking bubble" shape, a very fun idea for a "thinking of you" card.
This wild card can be found on page 54 of the wildcard booklet.


Circled in red are the images and quantities cut for this card.
Each image was cut at 6" (I do not use the real dial size feature)

The front bubble image was cut on double sided paper, so I was able to fold it over and glue the flap down, it created a great frame look. I then glued this directly to the top of my white card.I discovered a really cool effect for my "thinking of you" word. I wanted the word to pop off the card, but I knew using pop-dots would look too bulky for me, so I tried using liquid applique, this is like puff paint after being heated with a heat tool it puffs up.

I added white liquid applique to the back side of my word, let it dry for a few hours, then heated using a heat tool, then I gently dabbed my wide two-way glue over the puffed applique then placed it onto the front of my card. This gave me clean raised words, just the look I wanted.


A better view of the raised words

I added the cut out oval to the front of the envelope.post signature

Tuesday, February 16, 2010

Wild Card #22 -Thanks Quotes

I like how pretty this card turned out.... there is something so fun about adding lots of bling to a card. This is wild card #22 found on page 53 of the Wild Card Cricut booklet.

Below is page 53, I've circled the images in red that I cut for card #22.
Here are the cut images, I cut each at 6 1/2".

I used the inner frame piece to add to the inside of the card for writing my message.Bling!
Super quick and easy card.

post signature

Saturday, February 13, 2010

Wild Card #21 - A Lovely Doily

This wild card has some really lovely features; a doily shaped card, a rose and a beautiful square rose pattern icon.... hmm....how do you use that image on a card? I decided to challenge myself to use that square icon on my card. This wild card can be found on page 52 of the Wild Card Cricut cartridge booklet.


Circled in red are the images and quantities that I cut for this wild card.

Here is the cardstock and patterned paper I cut for my card, each image is cut a 5".
Note: I do not use the real dial size when cutting my wild card images.

The patterned paper is from Stampin' Up designer paper packet (discontinued). I only used the outer circle from the circle liner feature, the inner circle was discarded. For the phrase "How Thankful", I used my mini gel pen and holder in my cricut machine. The gel pens and holder I ordered from Custom Crops on line store.

I challenged myself to use the square rose icon feature for this card. I begain by tracing a circle using the outer circle image. Cut it out, then used my cricut spatula tool to lift/bend the cuts in the rose pattern.

I used three colorbox cats eye inks to add a distressed look to the rose. By lifting the edges the ink was able to scrape those edges and give a darker color there. I started with the light tan ink, then the dark brown, and finished off with just a little green.

Some of my edges of the rose did break away, but not to worry, I keep inking those as well, then when finished inking I adhered the rose to the same circle that I used to trace the original rose circle, the loose edges were easily put back in place, just like a puzzle. This image was now adhered to my doily card front.
For the two roses I used the same lifting/bending technique, then inked the edges, yellow for the rose, then green for the leaf and stem. I cut off the leaves and stem of the yellow rose then adhered that rose over the top of the green rose

I used pop-dots to adhere my lovely yellow rose to my card front.
Here are the finished envelope and the inside of my doily card. I trimmed the phrase using my paper cutter, inked the edges, then placed it on the inside of the card.

Challenge yourself.... when you find image in your wild card booklet that you're not sure what to do with, remember to challenge yourself and find a way to make that image a part of your card.

post signature

Friday, January 29, 2010

Wild Card #20 - Pinwheel -UR sweet

Hi wild card series followers, today's card is titled Pinwheel, this card is found on page 51 of the Cricut cartridge wild card booklet.
I was so excited to use the "pinwheel" feature of this card, fun and creative.
Circled in red are the images I chose from the wild card booklet page 51.
Below are the images I cut for this card. Note: the photo shows only one scallop frame, I cut two using the same paper. Each image was cut at 6", the white rectangle shape was cut using my paper trimmer at 4 3/4" x 5 1/2" I placed this on the inside of the card for writing the message on.
Also not shown in the photo below are the capital letters "U" and "R", they are cut from the same wild card cartridge on black cardstock found on pg. 45 for the "R" and pg. 48 for the "U". For these letters I used the "real dial" feature on the key pad then cut them at 1 1/2"
Inside of card, I used the center of the scallop frame to cover the back of the circle, this hid the backside of the brad.
I had the brad holding the large circle in place on the card, then rotated the circle 1/4 turn, stamped a flower then stamped 4 one word message in each 1/4" rotation.
The pinwheel is a fun card... come on... give it a try.

post signature