Showing posts with label Paper Dolls Dress Up. Show all posts

Wednesday, September 4, 2013

Day 3 Ornate Labels Halloween & Metal Die

Hi everyone, welcome to day 3 of the Stamp Release Party for My Craft Spot!
Remember each day, there will be prizes at My Craft Spot, then on Saturday we'll have a design team Stamp Release Party Blog Hop with prizes at each blog along the way! 
Join us everyday this week!!

Today's sneak peek is a spooky Halloween stamp set, Ornate Labels Halloween, and its coordinating Ornate Labels metal die set, again I had the privilege of designing this stamp set and metal die. This stamp set is perfect for your Halloween projects.

I made a simple treat bag along with the Ornate Labels stamp set and die I used a few cuts using my Cricut machine. The spiders are from the Doodle Charms cricut cartridge, the wand is from the Paper Dolls Dress Up cricut cartridge.
The small spider I attached to a tiny clothespin, both spiders I added glossy accents to along with red rhinestones for the eyes.
I love this saying that is in the Ornate Labels Halloween stamp set... "Magic is everywhere if you know where to look".
I added glossy accents to the wand then sprinkled generously with dazzling diamond glitter.
Thanks for stopping by my blog today, there are more fantastic projects made by Kimberly and her design team using the brand new Ornate Labels Halloween stamp set, and coordinating Ornate Labels metal die so head over to My Craft Spot, and while you are there remember to leave a comment on Kimberly's blog (My Craft Spot) today for your chance to win an new product item Sequins. click -HERE for My Craft Spot.

Join us tomorrow for day 4 of the stamp release party when we reveal the next stamp set.  All new stamps and metal dies will be available for purchase on Saturday September 7th.
My Craft Spot

Tuesday, November 6, 2012

Day 2 -My Craft Spot Stamp Release Party

Hi everyone, welcome to day 2 of the Stamp Release Party for My Craft Spot 
Today Kimberly and the design team are giving a sneak peek of the new stamp set "Stampin' Around Christmas" Once again Kimberly gave me the opportunity to design this stamp set, which goes perfectly with the Tiny Doily Metal Dies that were release in September.
Stampin' Around Christmas has a variety of Winter and Christmas circle sentiments, I choose the "Joy to the World" for my card and used the Tiny Doily Metal Dies.
The star was cut using George and Basic Shapes cricut cartridge, cut approx. 3" wide, I used a distressed tool to rough up the edges.
I added a bow using the yummy Gingerbread Cookies crinkle ribbon available at My Craft Spot.
I embossed using Tim Holtz Woodgrain embossing folder. 
I've done tons of inking on this card using the Tim Holtz Vintage Photo ink, Antique Linen, Tea Dye and on the embossed paper I used the vintage photo as well as a small amount of black and white inks.
This sweet baby Jesus was cut from Paper Doll Dress Up cricut cartridge pg 76, I also cut the manger as well.  For the straw I cut thin strips of cardstock and wrinkled it up in my hand then glued it to the manger, and below. I stamped the face using Peachy Keen Stamps PK-570 (I omitted the mouth on the stamp).
You'll want to see more images from the Stampin' Around Christmas stamp set so head over to My Craft Spot to see the fun projects made by Kimberly and her design team using the new Stampin' Around Christmas, also remember to leave a comment on Kimberly's blog (My Craft Spot) today for your chance to win the Tiny Doily Metal Dies, click -HERE for My Craft Spot.

Remember to join us tomorrow for day 3 of the stamp release party when we reveal the next stamp set which will be available for purchase on Saturday November 10th.

Monday, October 1, 2012

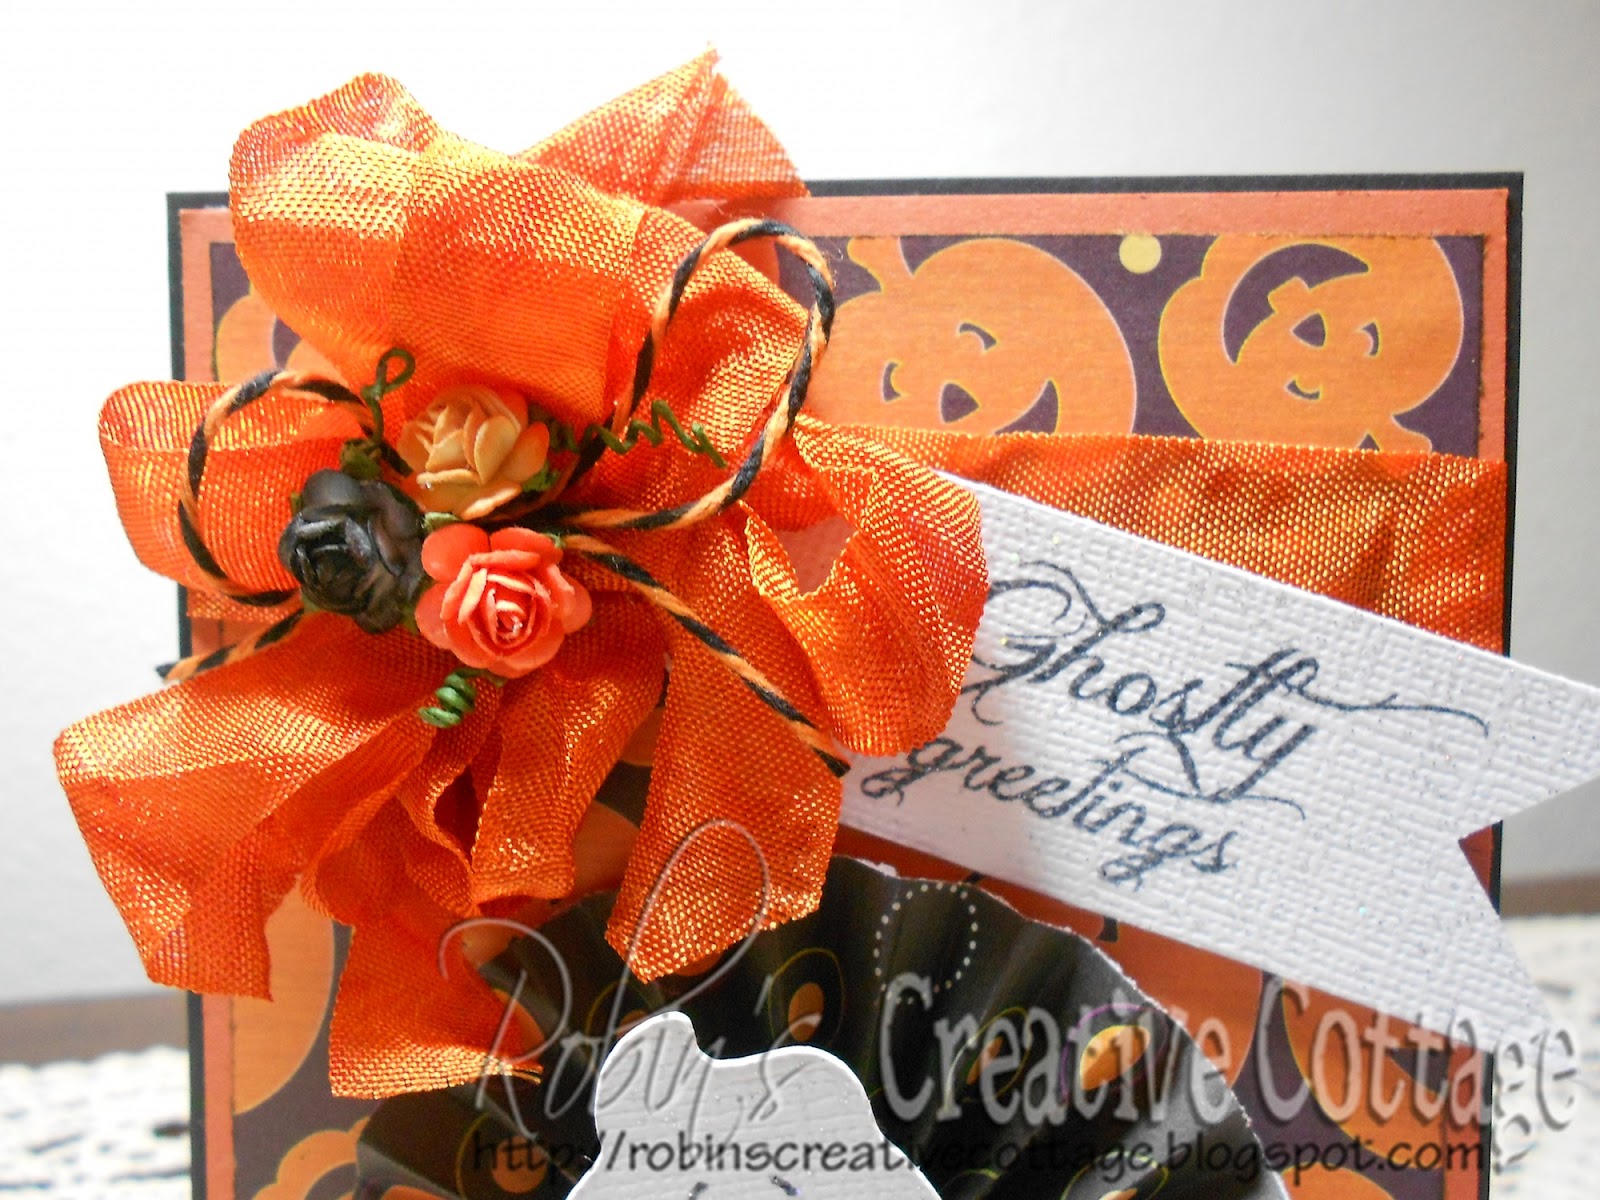
Ghostly Greetings -My Craft Spot Project

Boooooo.... it's October and that means getting ready for Halloween!  And today's challenge over at My Craft Spot will get  you thinking about all the fun!  

This weeks challenge...
Boo To You
Make a project with a Halloween theme

For my project I used Kimberly's fun new Halloween stamp set Ghostly Greetings 
 My bow was made using Marmalade crinkle ribbon, Orange Licorice bakers twine, and three tiny prima flowers. Ghostly Greetings stamp set, crinkle ribbon and bakers twine is available at My Craft Spot -HERE.
Close up of the ghost, it was cut using the Paper Doll Dress Up cricut cartridge pg. 49 (I omitted the face using my gypsy, then stamped the fade using the Peachy Keen PK-570 Basic Paper Doll Face assortment.
 The ghost is put on a homemade action wobble, Kimberly has a video of how to make them -HERE.
 Inside view, using stamps from the same Ghostly Greetings stamp set.
For more amazing project by the design team head over to My Craft Spot, and join us for this weeks Boo To You challenge -HERE.
Thanks for stopping by today!

Thursday, September 6, 2012

Day 4 Stamp Release Party! Rattle Dem Bones Coffin

Here we are at day 4 of the Stamp Release Party for My Craft Spot, and I'm having so much fun with these Halloween projects! Today we are sharing a sneak peek of the "Ghostly Greetings" stamp set, you will have so much fun creating Halloween cards and project using this set.

For my project I loved the phrase "Rattle dem bones" and when I saw it I had a creative idea in mind of a project that I wanted to make... I made a scary coffin, of course.
The coffin is cut from the Happy Hauntings cricut cartridge pg. 72, I used black Bazzill textured paper, then gently rubbed just the edge of a white ink pad over the paper before putting the coffin box together.
After I stamped the phrase, I wrinkled and tore the paper the inked the edges with a black ink pad.
I used tiny Prima Roses to make a bouquet and added leaves that I gently rubbed black ink on, I also added some thin twine that unraveled.
I used the Deep Plum crinkle ribbon (purchased from My Craft Spot) and tore and shredded it to give it a worn our look.
My little stack of bones were cut from the skeleton on the Happy Hauntings cricut cartridge pg. 29. I only used three bones and cut each three times and glued them together to make them thicker, then gently sponged black ink on the edges and wrapped all three bones using the twine.
The bats are from the Paper Doll Dress Up cricut cartridge pg. 53. I omitted the face and lines on the wings using my gypsy machine, then just added dots for the eyes using my white gel pen. I also gently rubbed the edges of the bats with a white ink pad.
Below is the inside of the coffin, I never go over board with the "scary" side of Halloween, so I made it cute and fun. This skeleton is from Paper Doll Dress Up cricut cartridge pg. 53.
 I used my black mini gel pen in my cricut machine to trace the skeleton, then cut out the image using the machine as well. I put the skeleton on a homemade wobble spring so he wiggles a bit.
The Happy Halloween! phrase is from the same "Ghostly Greetings" stamp set.
Close up of the skeleton.
Thanks for visiting my blog today, there are more great projects made by Kimberly and her design team using the brand new Ghostly Greetings Stamp Set so head over to My Craft Spot, and while you are there remember to leave a comment on Kimberly's blog (My Craft Spot) today for your chance to win the Candy Corn Kisses Stamp Set. click -HERE for My Craft Spot.

Wednesday, November 16, 2011

RCC Stamp Release Celebration -Day 3 "Sneak Peeks"

Monday and Tuesday were such great days sharing the sneak peeks of the Snowman's Prayer stamp set Along with great giveaways from Prairie Bird Boutique wrinkled ribbon, and from me, one of my favorite products, Sticky Tape. There is still time to leave a comment on Mondays and Tuesdays posts to be eligible for these prizes. And if you missed the Snowman's Prayer sneak peeks check out the two previous posts.

I have to tell you that each day of this week I get more and more excited to share all these great stamp set images with you, I can't wait to show you what my design team has created using my Gingerbread Holiday stamp set... and I will today and tomorrow.
Remember Friday will be our fun Blog Hop and that is the day that the stamp sets can be purchased.

On to today's projects...

I made these super easy treat boxes using a piece of cardstock measuring 4 1/4" x 12". In my video I show the template that I used on my gypsy to cut an image in the cardstock to create window... really it's super easy.
Paperdoll dress Up pg. 73 Gingerbread boy image
Christmas Cheer pg 88 Tree image
Tags were made using my Gingerbread Holiday stamp set.

Now for my design teams wonderful projects

Gwen
The gingerbread border punch is absolutely lovely... oh how cute!
Karen
Such an adorable gingerbread man with his cute little "blinged" up sign.
Linda
A wonderful shaped card, and stamping the sentiment on patterned paper is lovely!
Maquel
Oh so yummy, the cocoa almost looks real! Cutting out the sentiment in a fun shape is a great idea!
Patty
This treat topper is so cute with Santa and Rudolf and the sweet little bird on the tag.
Sheila
This is the coziest chair ever, I could just curl up on it and take a nap! I love the lace around the "pillow"

Today's sponsor is "The Twinery"
The Twinery has generously donated "The New Ultimate Color Sample Pack"
14 colors, 210 yards of beautiful twine
Thank you "Twinery" for donating this generous prize
Leave a comment on todays post to be eligible for this prize from "The Twinery"

Remember to "like" me on facebook, there is a "like" button at the top of my blog on the left hand side bar.

post signature

Monday, October 17, 2011

Look How I Decorated my Milk Carton Boxes -Video and Lots of Pics

I had fun decorating my Milk Carton Boxes. In this video I share the details of which cartridges that I used and the measurments of each cutout.


The phrase stamps that I used are made by my good friend Barb, you can find them -HERE at BugBites.
Enjoy the close up photos
Thanks for visiting today.

post signature

Monday, September 27, 2010

SEW Ghostly -Fantabulous Cricut Challenge

September is National sewing month, and even thou it's almost October I'm getting a bit of sewing in to celebrate.
Fantabulous Cricut is having another great challenge this week...
Create a project using some type of stitching, hand, machine, or faux stitching

I used the Paper Doll Dress Up cricut cartridge for the spider web and the ghost pg. 49, the spiders are from Doodlecharms cartridge pg. 121. For the letters I used George and Basic Shapes cartridge and used my Design Studio to weld the letters together.

I poked holes in the cut out "boo" using a piercing pad and tool.

Then used a needle and black embroidery floss (2 strands) to hand sew in the holes that I made.

Go check out all the other great projects by Fantabulous Cricut's design team -HERE.
and join us for the "National Sewing Month" challenge.
Boo to you... have a great day!

post signature