Monday, December 7, 2009

Blog Candy --Winner--

I'm so excited to announce my 1st blog candy winner from a wonderful list of 20 kind people leaving comments on my blog, thank you so very much for participating.

To be 100% fair I went to random.org and used the number generator and the winning number is...#1


Yes #1--- wahoo to ~KarenJG~ she said...

Congrats on 50 followers! That is awesome!

________

Karen please contact me at robinscreativecottage@yahoo.com with your address and I'll send your goodies right away.

Thank you again every one who commented and for wonderful new friends who follow my blog. As of today there are 59 followers. My heart is full.

Have a wonderfully creative day!
Robin :)

Sunday, December 6, 2009

Just Buggin' Challenge 14

Just Buggin' Challenge #14 is here -Layers

The challenge is to use at least two die cuts and layer them together. (for instance, cut out flowers in two different sizes and layer them on top of each other, two snowflakes, etc)

I have so much fun creating this card, then after I made it I referred to the challenge... does this cake and the cake shadow count as two die cuts? hmmm... well this was just fun!

Layers
Cricit cartridge used: Stretch Your Imagination page 61
I cut each color of cardstock several times then layered them on top of each other making a very thick cake, even the candles are layered.
The card is cut 8 1/4" x 9 1/4" then folded in half the long way. This card fits in a legal size envelope.

Just Buggin' has weekly challenges to inspire us to use our Cricut machines, come join the fun!

Have a wonderfully creative day!
Robin :)

Wednesday, December 2, 2009

Blog Candy --50 followers

I want candy...(drum roll)... I want candy...(drum roll)... (sing with me.... remember that song? that's all I remember LOL)

I feel so blessed to have 50 followers to my new blog, so of course I want to do something for you... (offer them candy) I heard a little snow birdee whisper "offer them candy" "Of course, great idea birdee".

As a thank you I have candy... real chocolate nuggets... in addition to winter crafting goodies for you to create with. Details about the nugget box can be found here.
Just leave a nice comment directly below this posting. I'll announce the winner on Monday.
Please only leave one comment.
Sing with me..."I want candy...(drum roll)... I want candy...(drum roll)"...

OK.... I couldn't stand it any longer, I had to look up and listen to the song. I also looked up the lyrics (because this is what I have my girls do before they buy and download a song, we do our best to keep our lives clean) and found a super clean video here.
I'm totally an 80's girl, yes, I had the big hair flipped up collar... oh yeah, I loved it! I can prove it too... -see photo- 1987. I used to go dancing every Friday and Saturday night, now my 3 girls are teenagers and just laugh when I dance and we have a great time.
Have a wonderfully creative day!
Robin :)

Tuesday, December 1, 2009

Tutorial-- How I Print on a Cutout Shape Using My Computer Printer

For me it's easier to cut out a shape then print the words from my computer onto the shape, then to print words, then cut out a shape.
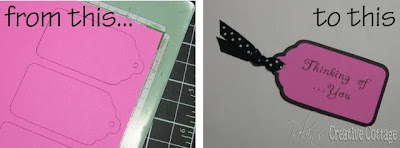
Keep in mind I am a self taught computer girl (my girls still show me how to do things on Microsoft Word that I'm amazed by).

Here's my tutorial:

First cut out the shape that you want on your Cricut machine, I usually cut the shape two or three times... keep reading I'll tell you why. The tag shown below is from George and Basic Shapes Cricut cartridge pg. 102 size 2 1/2".
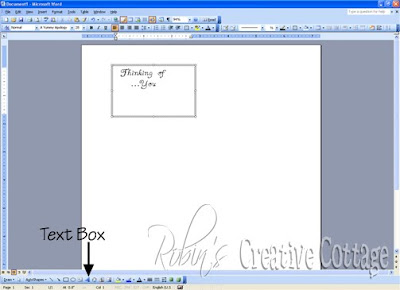
In your Word program or which ever program you use, type the words you want, choose the font style then guesstimate on the size. I used "A Yummy Apology" free font from dafont.com
I like to use the "text box" because I can move it around the page freely.
When you have your desired words, print on regular computer paper.
Place your cutout shape behind the text that was just printed, see if you need to adjust your font size. If you do change your font size then move your text box on a different area of your computer page before you print. Print again, continue doing this until you reach your desired size.
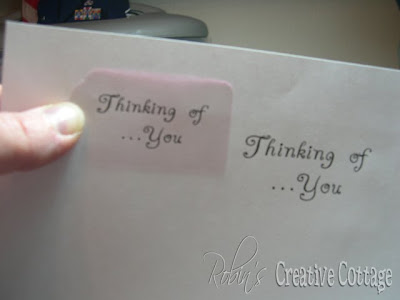
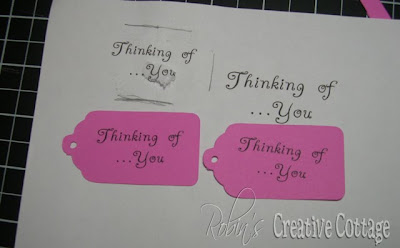
Carefully lay your paper down with your cutout shape behind, then gently sketch a few lines using the edge of your cutout shape as a guide, this way you will know where to place your shape onto the front of the printed paper.
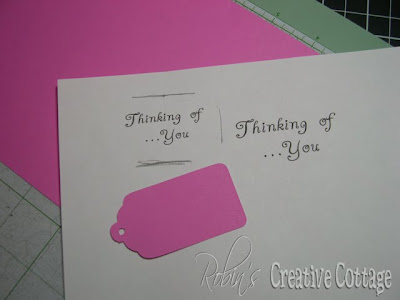
Add tape onto the back side of your shape then place inside your sketched lines, do not to use a tape that is too strong or your shape will be difficult to remove from the printed paper.
Now print this page just as you did previously, the printing should print directly on top of your shape.
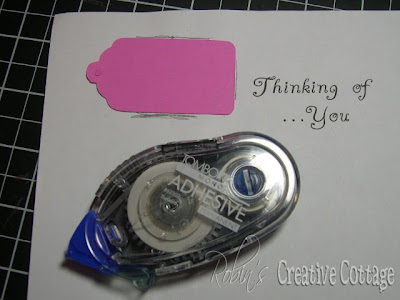
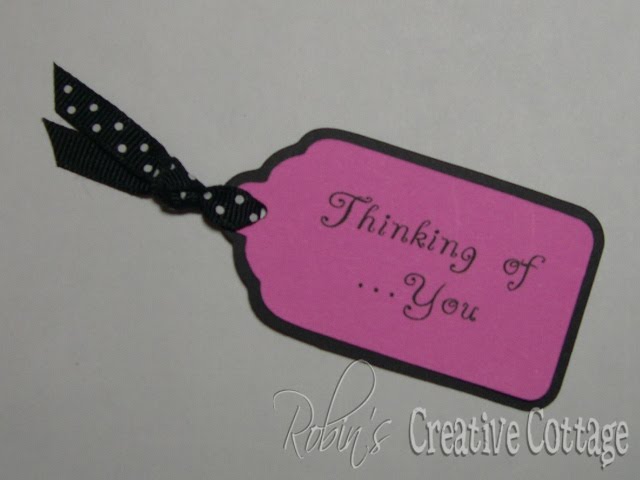
Now the reason I cut out two or three of the same shape... If I don't get the paper just right in the printer it prints crooked, or I may get an ink smear on my shape. Thus the extra cutout shapes.Carefully remove your cutout from the printed page and there you have it... print on a cutout shape. I added a shadow feature to my tag then punched a hole and added ribbon.
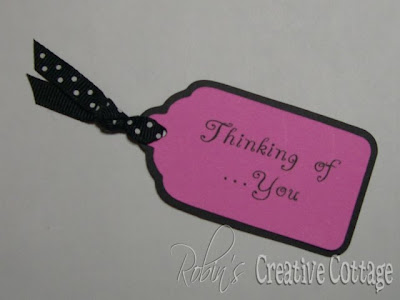
If you have any questions leave a comment or email me at robinscreativecottage@yahoo.com

Have a wonderfully creative day!
Robin :)